Guinness Guide to Aging Your Weapon: Part 1
filAKairsoft
16 Jun 2008

Editor's Note: This one's a contribution of FilAK Airsoft with permission from the original author and this will be shown in three parts over the week, thanks to FilAKAirsoft for this which also makes me want to get a woodkit for the CYMA Thompson. You've upgraded. You've accessorized to your heart's content.. What more can you do to breathe life into your current favorite? Here's how . . . courtesy of Guinness, admin of WWIIAA and master of the tips and tricks to distress, weather, and age your airsoft replica. Here's Guinness:
Right then,
I have been threatening to write this up for a while now and weekend after weekend comes and goes and I seem to find something else more exciting to do than sit down and write a 'How-To weather your rifle' article.
It's my own fault of course, if I didn't have this selfish obsession with photographing my guns and plastering them all over the interwebs, no one would ask how to do it......
Oh well I dont see myself stopping the photography anytime soon, so I'd better get this article behind me.

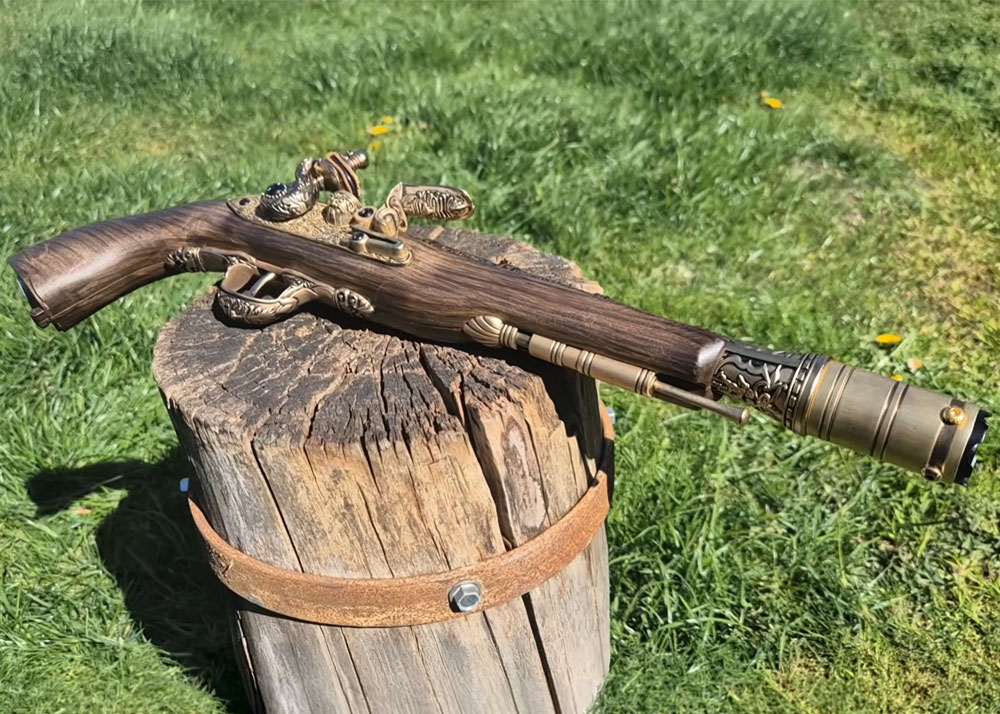
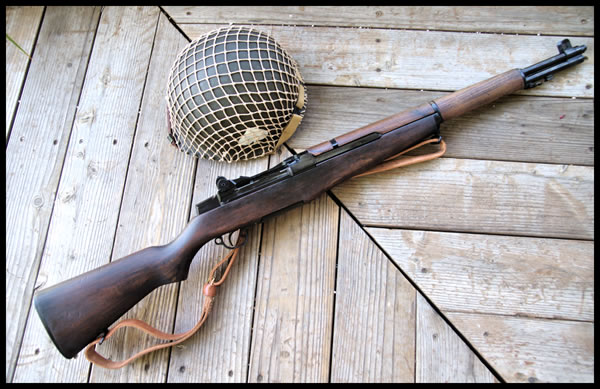
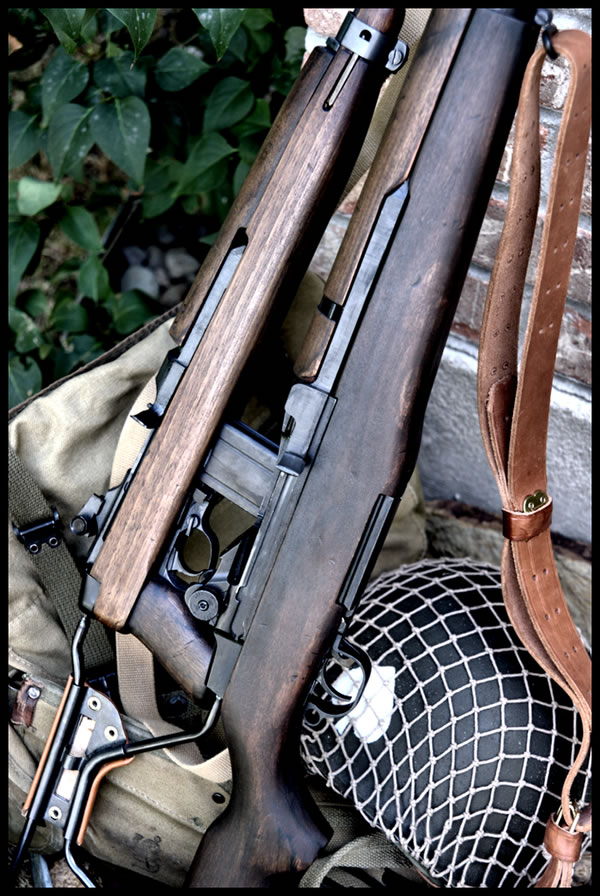
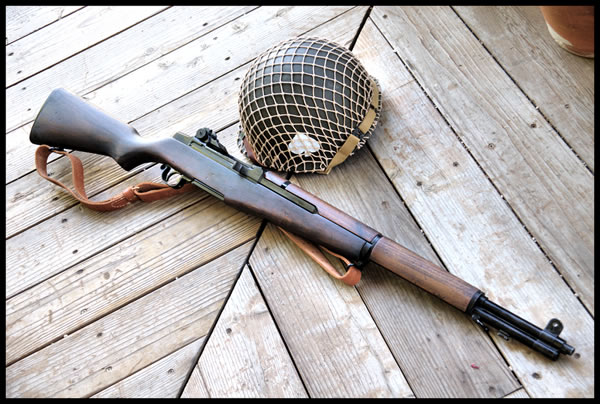
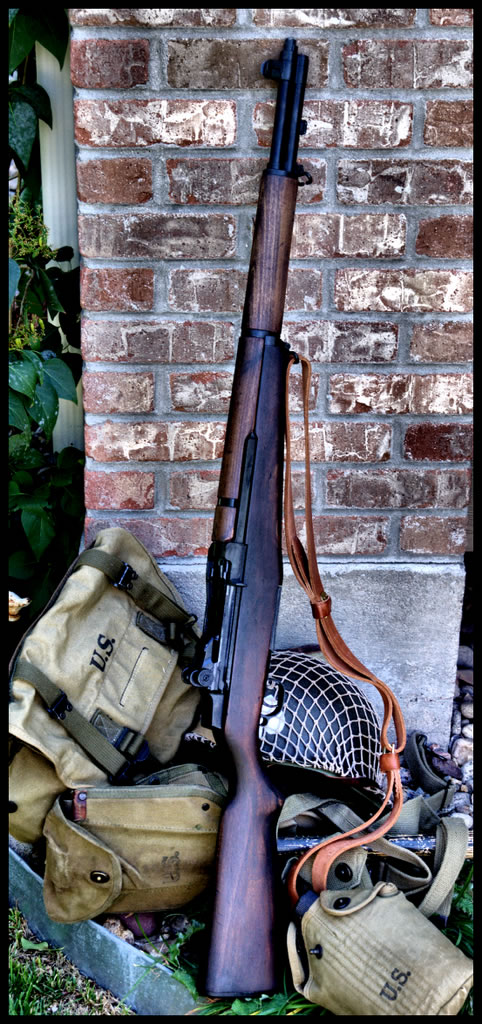
We're here today to talk about how to turn this:
and this:
...Into this:
For this tutorial I will be adding on to to articles already written here andhere.
Basically this process involves a bit of sanding, a bit of painting, a bit of abuse, and a fair bit of imagination.
That's the use and abuse that real weapons of war see, so why not bring that level of immersion and 'milsim' to your Airosoft impression and give your gun the battle-hardened appearance of a real veteran? Don't worry, it's easy to do, and this guide will show you how.
Preparation
Materials:
Here is a list of items to pick up form yoru local arts & crafts store (Michaels, Hobby Lobby) and your local hardware store.
Arts & Crafts Store:
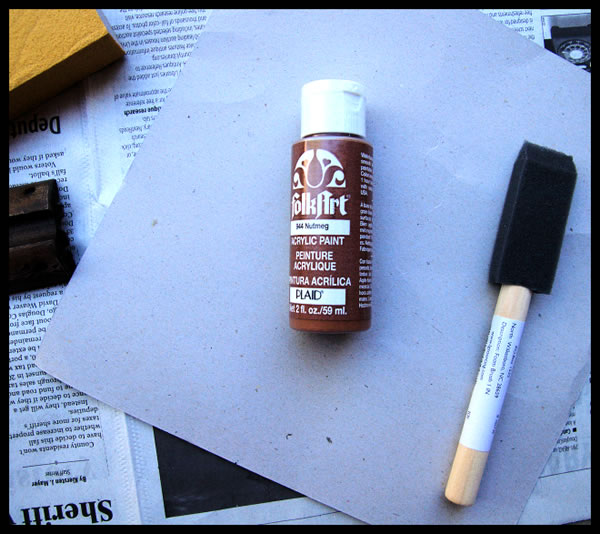
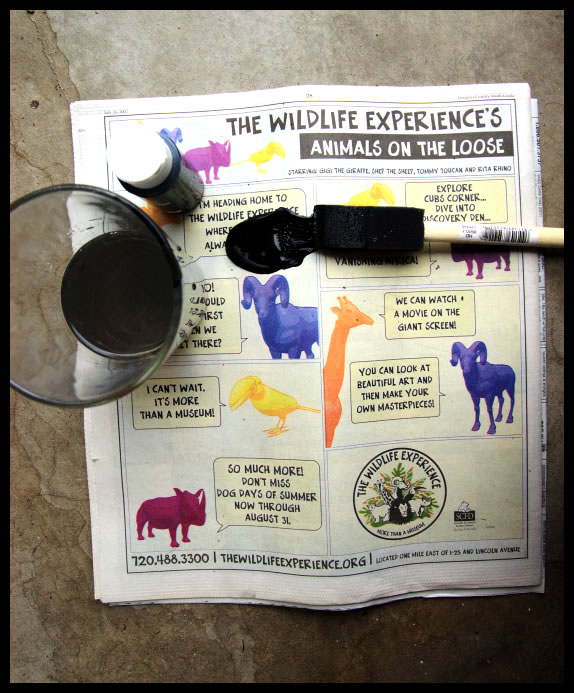
Acrylic Paints - Generally around $2 bucks a bottle. Good because they are water-soluble, mistakes can be easily fixed
HardwareStore:
- Sanding Block - Foam sanding blocks make sanding the stock a little easier on the hands. Usually around $3.50 Get one medium grit and one fine grit.
- Steel Wool - Comes in bags with a bunch of steel wool pads, I think thats like $5 bucks. This is for fine sanding and buffing of metal edges to show wear. Works great on M16's or metal magazines.
- Linseed Oil - For any wood furniture gun you are working on, after you complete the sanding, distressing and final application of the acrylic paints and wipe-off, it is important to apply linseed oil to protect the wood as well as give the gun that authentic luster that a real steel weapon would have. Get the smallest container they have, about $4 dollars.
- Foam corner brushes - The black foam brushes for painting corners, get a few 1" inch, and 2" inch brushes, shouldn't be more than .50 cents each.
Optional Stuff:
Stencils - Can be found in hardware store or Arts & Crafts, I found better ones at the crafts store, but if you have maybe an M1 Carbine or M2 or even an M16 or M14, you could add a rack number to the stock.
Tools Needed:
- Hammer
- Big, Plastic handled Screwdriver
- Standard weapon disassembly tools, screwdrivers, allen wrences, etc.
- Cloth Hand Towels or Shop Rags
Step One- Work area Prep
Clear off a large area of a desk, or better yet, one car bay in the garage. You are going to be dealing with sanding dust, paints, water, linseed oil, all kinds of things that generally aren't 'inside project friendly' so the best place to do this is in the garage.
As with any project of this type, lay down plenty of newspaper as a blotter for the paint and to protect the pieces to be worked on as well.
If possible I like to be close to the ground, not standing at a workbench, that way parts have less distance to fall and get buggered up I think, but to each his own. I just use a cooler as a table and another cooler to sit on.
As shown in the Garand article, it is always best to field strip the weapon down to its three groups to perform this work.
Step Two- Sanding
Here is where you will thank me for the foam sanding block suggestion. On any Airsoft replica that has wood furniture, there is a clear coat layer that is the outermost layer of the finish, this gives the wood a shiny luster. This must be sanded down first of all to allow the acrylic paint to get into the grain of the wood and work, and to allow you to remove the original dark brown or maybe red color that was originally applied to the stock.
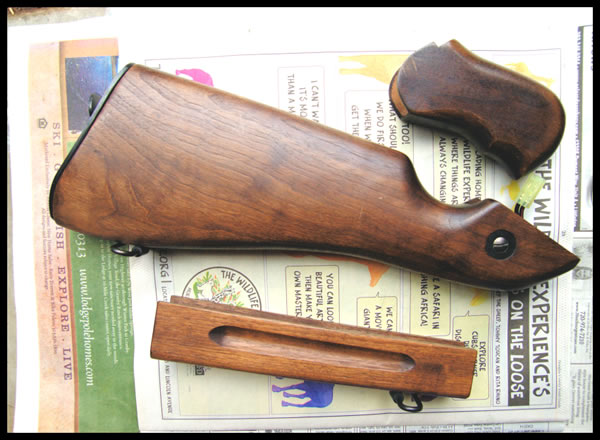
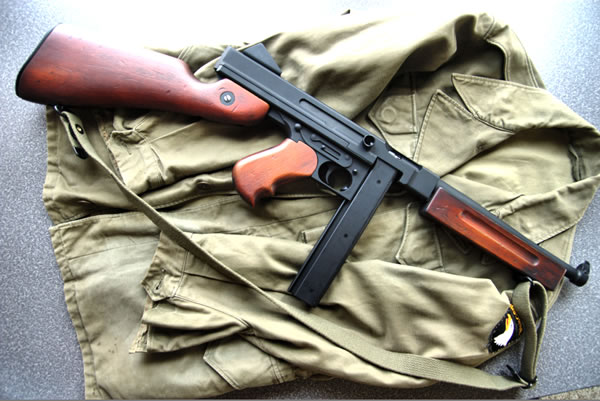
Photo above: CAW wood kit for TM Thompson original finish and color
This is a time consuming, manual process and the sanding blocks simply make it easier to get ino the nooks and crannies that conventional sand paper will not. Plus they generally fit your hand better so you avoid strain or cramps.
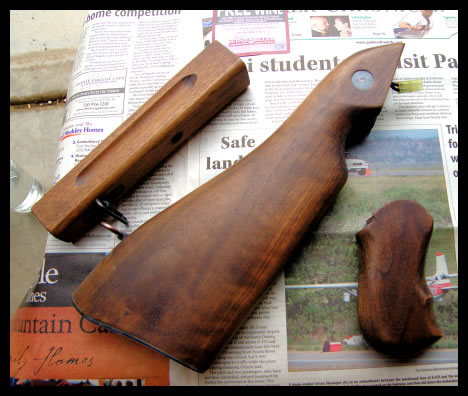
CAW Wood kit for TM Thompson after first sanding
So sanding is really to accomplish two things, to remove the clear coat finish so that the paint will be able to get into the wood and stick, and secondly to remove whatever previous stain or paint color may exist on the wood. As stated this takes time, and effort, so be prepared to go through a couple of passes before your ready for the next step.
Best thing to do is sand an area, wipe it down, see if the clear coat luster is gone or the color from the stain is reduced or whatever effect you are looking for. Be careful not to sand too much and cause un-even areas or patches on the stock.
Step Three - 'Distressing
Here is where you get to take your frustrations out on a defenseless, inanimate object......
This is where you are going to literally beat the S*%# out of the stock, handguard, whatever the piece of furniture maybe to give it that 'worn' used look.
For this you will want your trusty hammer and plastic-handled screwdriver. Personally I use the screwdriver more than the hammer, but a good hammer-claw gouge in a stock always adds that war veteran look, haha!
Grab the screwdriver by the shaft and swing away at the stock. Imagine that every dent, scrape and nick is a rock, pillbox or Nazi helmet that is adding that 'character' to your weapon.
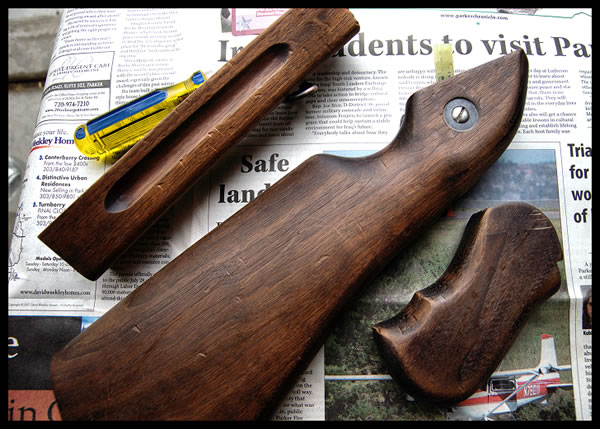
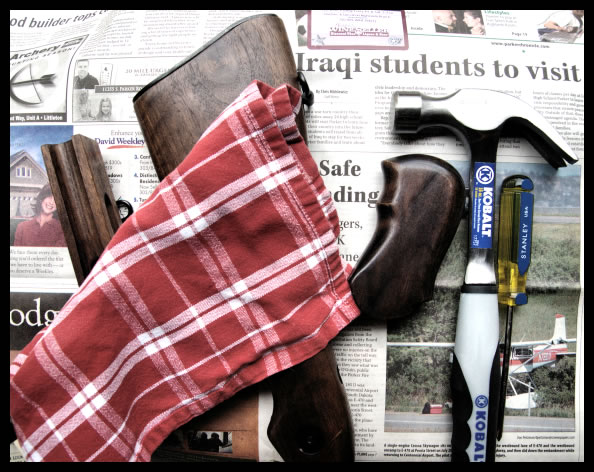
Photo above: Thompson furniture after 'distressing' with screwdriver and hammer
After the 'beat-down' give the wood another sanding to remove any rough edges caused by the abuse.
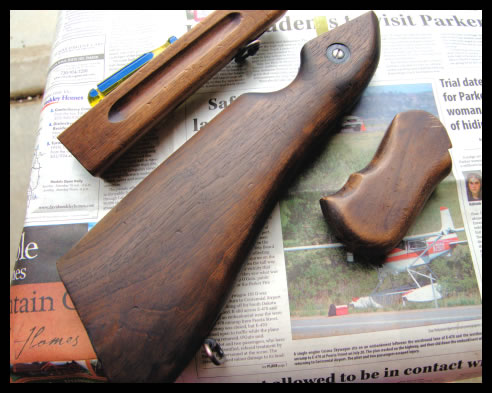
Photo above: After distressing, after second sanding
Now comes the real fun part. The part where you can really use your creativity and imagination, because it is here that you decide just exactly how dark the wood is going to be, and how 'aged' the appearance will end up.

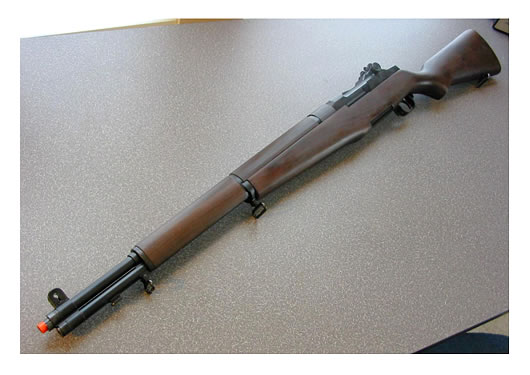
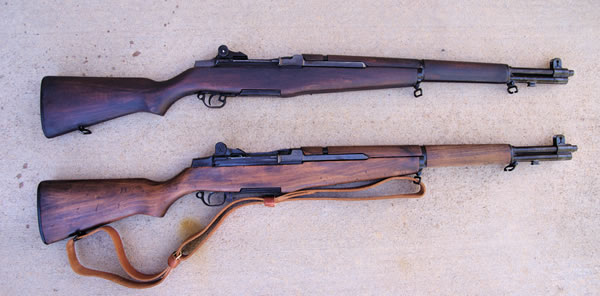
Photo Above: TM M-14 with ACM Wood kit 'Before'
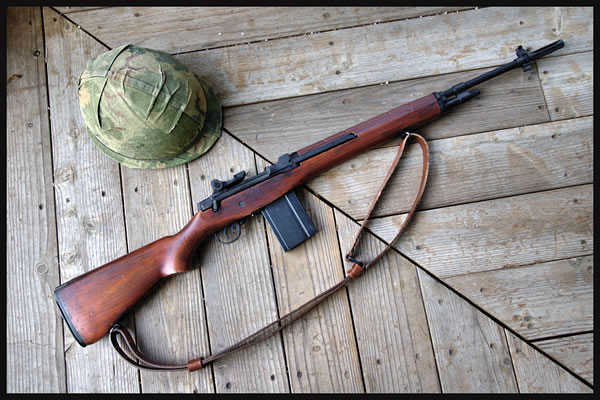
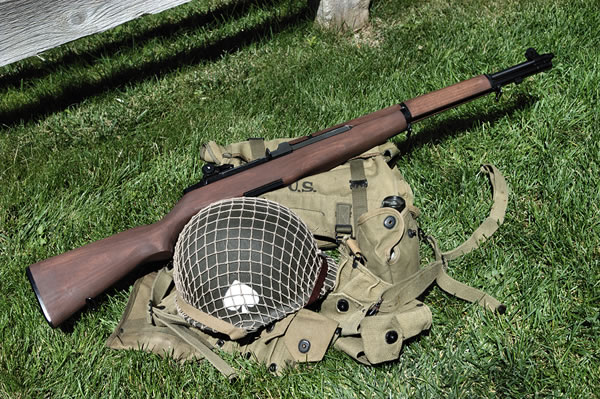
Photo above: M-14 'After' process
Get yourself a little paper plate to mix up your paints in, its less messy. but the newspaper also works in a pinch. Dilute with water as you feel necessary, the more the color is diluted, the less the effect on the wood will be. In other words, if you want the new color dark, use more paint, less water.
The painting process is as follows:
Paint an area, wait 10 to 20 seconds, wipe off paint.
You are simply 'washing' or brushing this color into the paint and then wiping the excess off- your not trying to completely paint the wood the black, or brown or whatever color your using- just giving it a 'stain' of the acrylic paint you are using.
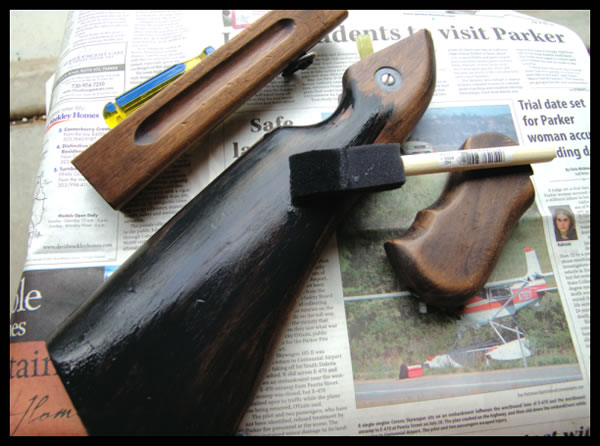
Photo above: Thompson furniture with first black wash coat applied and drying
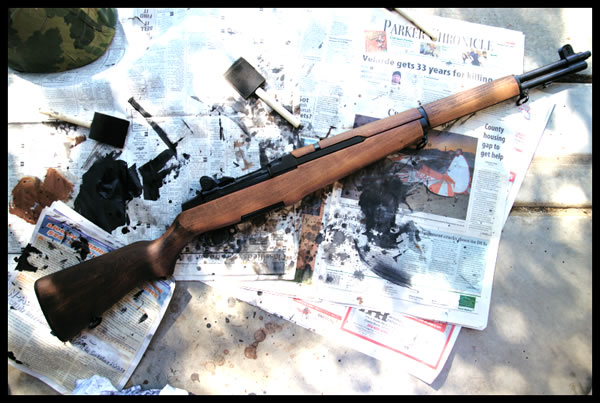
Photo above: Starting at buttstock end of Garand
Remember, you don't want to leave the paint on very long. However, also remember if you do that your using acrylic paint for this exact reason! They are water soluble, so if you dilite the brush with water and go over the paint, you can wipe it right back off.

Photo above: Here is Thompson stock after distressing and after the black acrylic paint wash and wipe
After the paint application and wipe down, you will notice that the 'flaws' or nicks and scrapes that you put in with the hammer and screwdriver now stand out due to being darkened with the balck paint.This is exactly the type of authentic beat-up appearance you are looking for! Well done!
The previous two steps can be repeated and redone to achieve the level of distress, or the paint color or darkness you desire.
Let dry..... (fortunately, acrylic paints are very fast drying :-) )
Step Five- Linseed Oil
As stated earlier, after you have sanded the crap out of the stock and whatever other wood pieces your working with, then beat the crap out of them, then painted them and wiped them down, the wood is need of some treatment to keep it from getting all chalky from the acrylic paint.
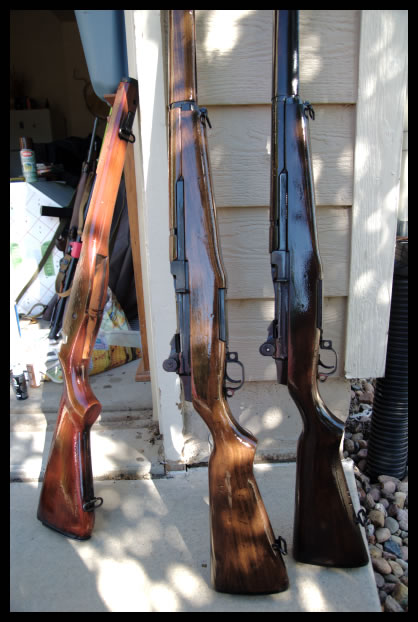
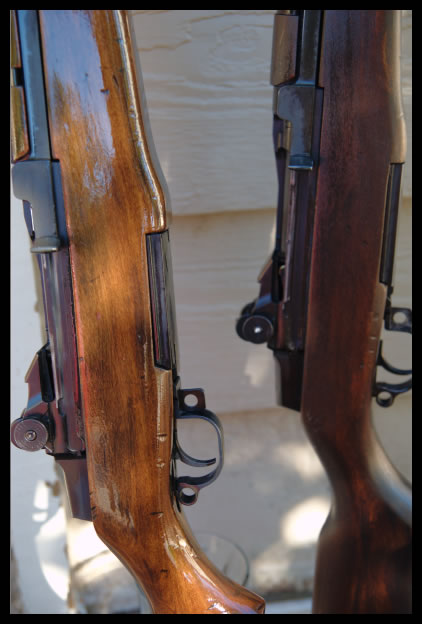
Photo above: Closeup of linseed oiled stocks
I'm an impatient cuss (probably the adult ADD kicking in ;-) ) so I only let them sit and soak in the linseed oil for like 30 minutes or so- the longer the better, the wood they use is very thirsty.
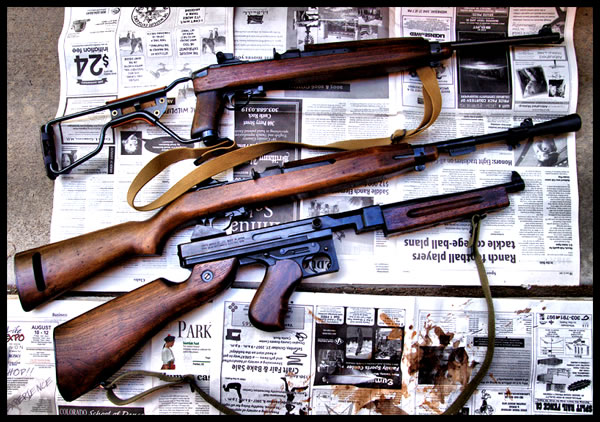
Photo above: Thompson, M2 Carbine and M1A1 Paratrooper Carbine after linseed oiling
Conclusion
So, well yeah...that's pretty much it- Here's something that everybody can do and with a little practice and imagination you can take your weapon up to the level of realism that you may have only had in your kit and clothing impression before!
CYMA Thompson project
AGM MP40 project