My Wolverine Airsoft Reaper-Wraith Project
Master Chief
06 Nov 2017
HPA is making a resurgence in airsoft in the past few years. It was brought about by the inability of gas blowback rifles to perform to their optimum best in cold weather. We have the same problem here in the U.K. We have been blessed with a great warm summer so far but as the weather will start to cool down, the problems with gas blowback guns and rifles come back to haunt us.
Then the HPA engines and systems came. Although most of these set-ups do not have a blowback and recoil feature, they still managed to get a cult following in airsoft. I myself have a HPA airsoft system and I love it. One of the best things for me is not having to worry about charging my batteries the day before a game. Some sites even offer tank filling service so players do not need to worry about getting their tanks filled before game day.
One of the advantages of a HPA system is the speed at which you can shoot in semi-auto mode but the disadvantage of almost all of them is that you need to use a air line to connect your rifle to your air tank. This is not a huge problem as I found out playing with a line for more than a year. You sort of get used to it and find ways on how to place the line so that it doesn't get in your way. But if you want to use it in a competition such as a 3-Gun Competition or even just on normal skirmishes where you do not want to hassle of having to work around your air line, then it will cause some issues. In 3-Gun competitions, the transition between weapons is very crucial and this will not be possible with an air tank and a line.
Now this has always been a project that I want to do. To assemble and build an air powered airsoft rifle, preferably an M4 without the need of an air tank. And I know that the only way to go around this is to use Co2 bulbs. I was aware of the Wraith stock tube developed by Wolverine Airsoft but did not have the right information and connections to go about acquiring it for a project. Plus, I will still need an HPA engine to go with it and so I shelved this project for now as I do not have the resources to do it.
During the IWA Outdoors Event 2017 in Nuremberg, Germany, I had a chance to meet Rich Lort of Wolverine Airsoft himself. We started talking about Wolverine airsoft and the different HPA engines that are currently available and his other new products on development. Whilst we were talking, I mentioned this project build that I wanted to do. This is when he said that he may have the perfect combination for this and he showed me the Reaper HPA engine and to combine it with the Wraith Co2 stock tube.
After waiting for a few months after the IWA 2017, Wolverine Airsoft have finally released the Reaper and boy what a beauty it is. All Wolverine products are a product of beauty anyway but the Reaper is the first of their products that I will get a chance to try and review. Together with the Wraith Co2 stock, this should be a very good one.
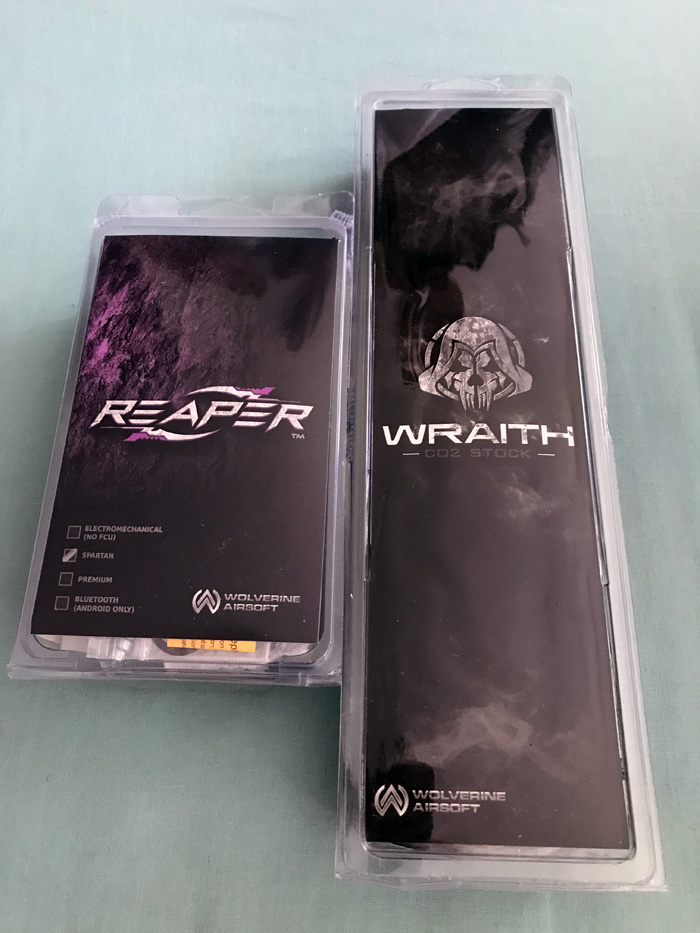
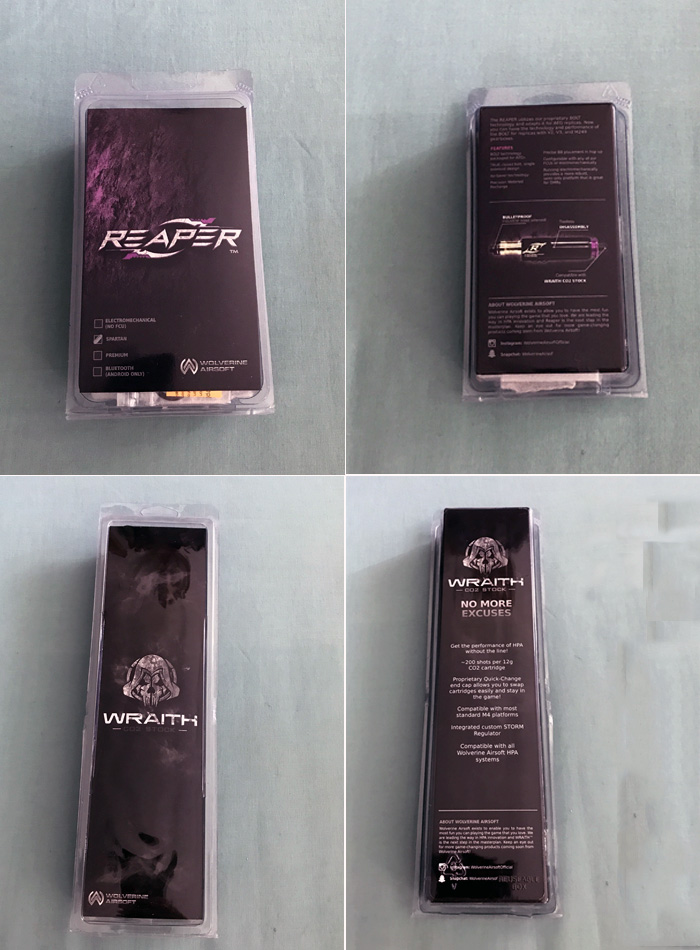
The Reaper and the Wraith came through the post about 2 weeks after leaving Stateside. They are very well packed in a cardboard box. Inside, the two items are nicely packed individually. The Reaper is packed in a slightly smaller clear pastiche box with a nicely printed cardboard cover of its name and also indicates what version of the product it is. In this case, the Spartan edition as I asked Peter, Wolverine Airsoft Marketing Director, to send me a version where I can still have full-auto firing mode function. The Wraith Co2 stock also comes in a clear plastic box with a very smart cardboard sleeve.
“FearTheREAPER”
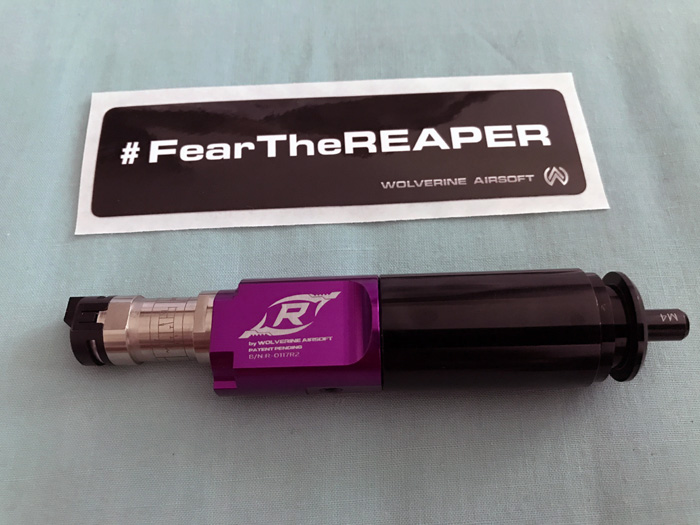
The Reaper is the latest creation of Rich Lort to add to the Wolverine Airsoft family of HPA airsoft products. The Reaper is a closed bolt system which is described as the Bolt technology for AEG replicas. Its main features are:
- Bolt technology packaged for AEGs
- True closed bolt, single solenoid design
- Air saver technology
- Precision metered recharge
- Precise placement of BB in hop-up
- Can be used electromechanically or in combination with any of Wolverine Airsoft’s FCUs
- Using the Reaper electromechanically will provide the user of a robust semi-only platform which is best for DMR users.
The construction and build quality of the Reaper is very impressive. The package comes complete with the Reaper, a complete set of spare O-rings, the Air-line and the air inlet nozzle, in this case, the FCU, a “#FearTheREAPER” sticker and a Reaper patch.
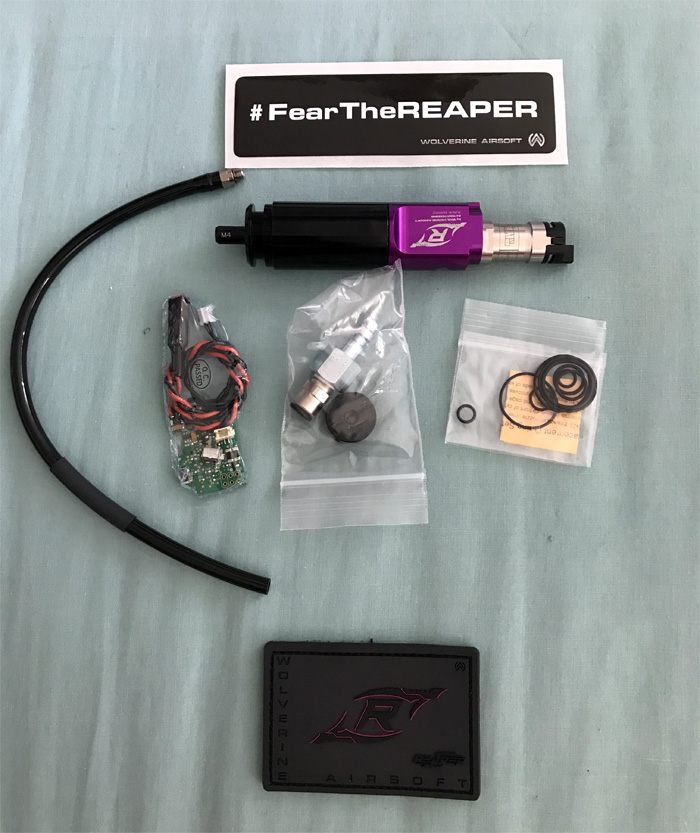
The Reaper uses the same single solenoid as the Bolt engine. If you intend to use it solely for a DMR airsoft rifle then the best way to go is to use the electromechanical version which is also a bit cheaper than the Spartan version.
THE WRAITH CO2 STOCK
Part of the aim of this project is to be able to use the consistency and in my opinion, a better and more responsive shooting that you get from a HPA powered rifle but without the air-line and bottle. Unfortunately, GBB rifles can be a bit temperamental in cold weather conditions so the option that I had to go for is Co2.
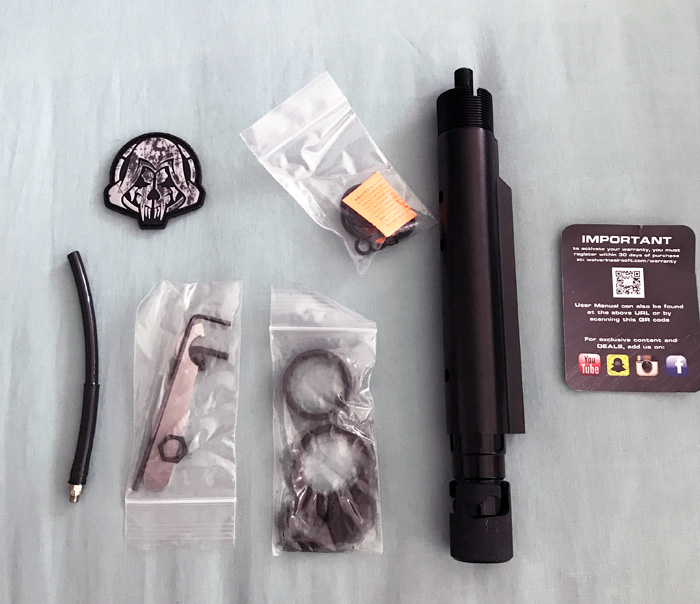
The Wraith package comes complete with the Wraith stock with the integrated custom STORM regulator, a set of spare O-rings, air-line, 2 Allen keys, a small wrench, lock nut and sling attachment and a patch.
The Wraith Co2 stock has always impressed me from day one. For the past year, I have been playing with a HPA platform rifle and have loved it from the start. Unfortunately, the airline limits it full ability. It is okay to use in skirmishes and I actually got used to it but when I was thinking of venturing into practical shooting including 3-Gun shooting, the air-line will be a major problem for me with regards to freedom of movement and manoeuvrability. So upon seeing Rich demo the Wraith in one of his YouTube videos I was certain that this would be the solution to this problem.
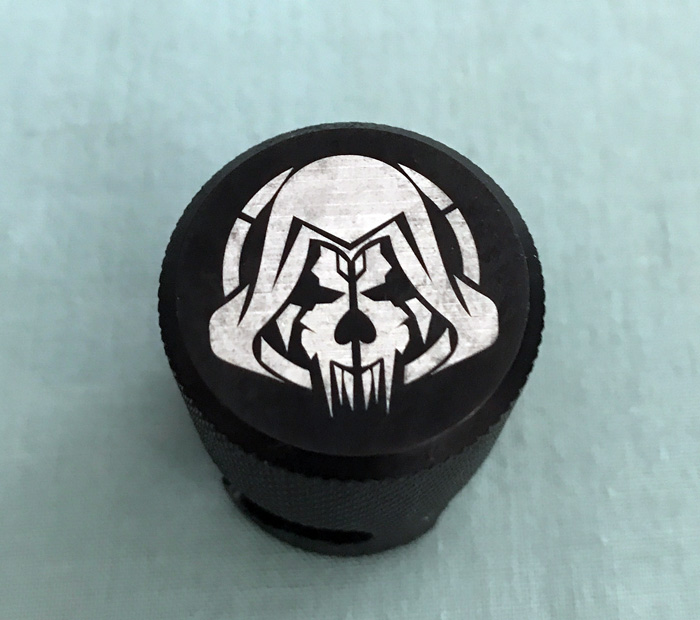
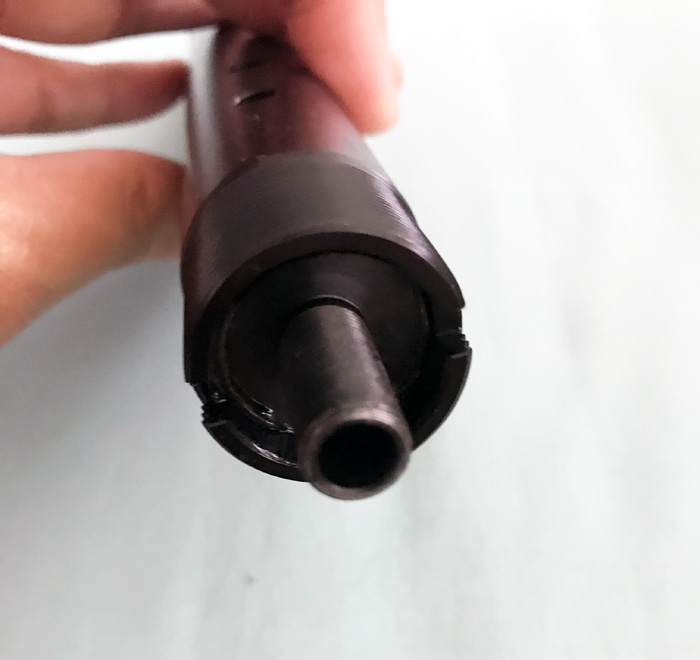
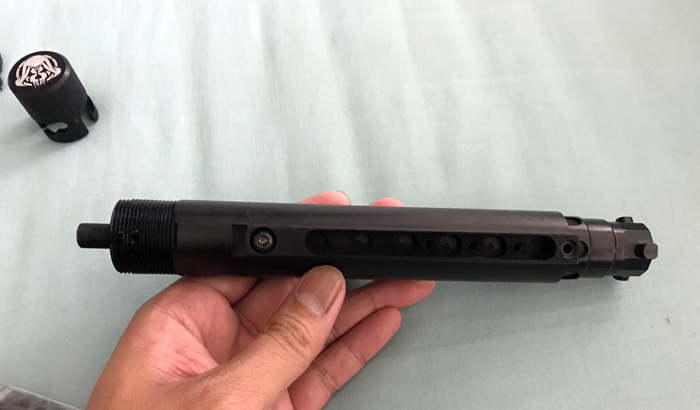
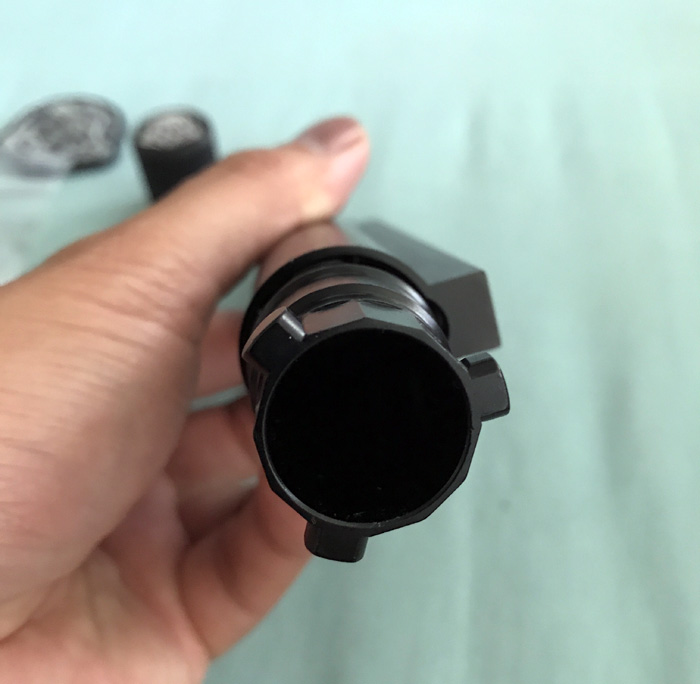
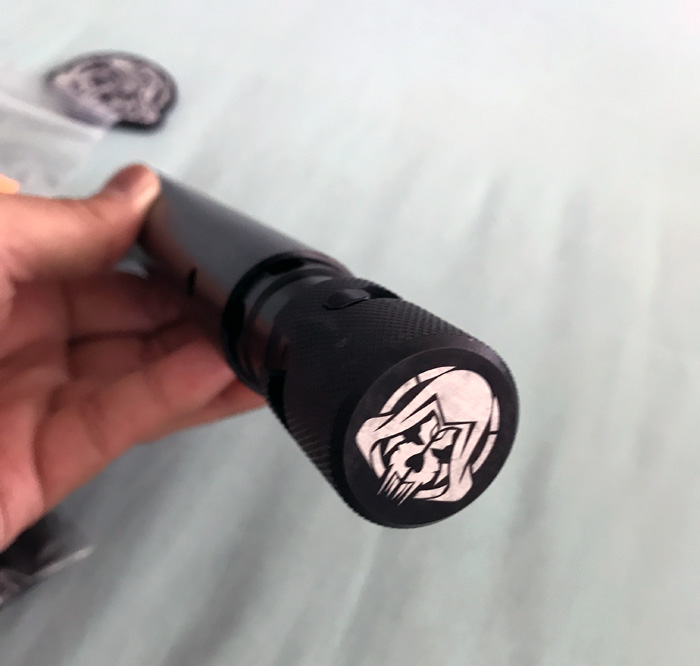
So the Wraith is basically designed to replace your buffer tube stock. It has its own integrated custom STORM regulator which is fully adjustable. It has a patented quick change/release cap design which pushes the Co2 bulb into the puncturing mechanism to release the Co2 into the tube and regulator. This quick-change end cap design allows you to change the Co2 bulb in game in a matter so seconds. The design will also allow you to get around 200 shots per 12g Co2 bulb or cartridge.
The Wraith also has a feature where you can adjust the engagement of the Co2 bulb into the puncturing mechanism by shortening or lengthening the rear end of the tube. It also comes with a screw that stops the stock to where you prefer it to be after changing the Co2 bulb.
INSTALLATION
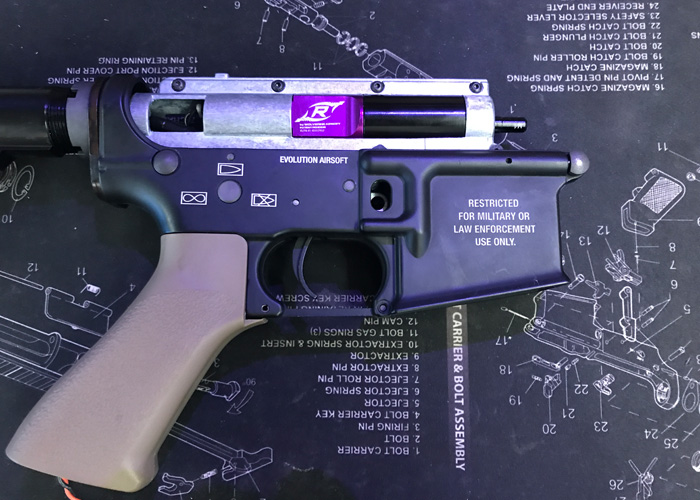
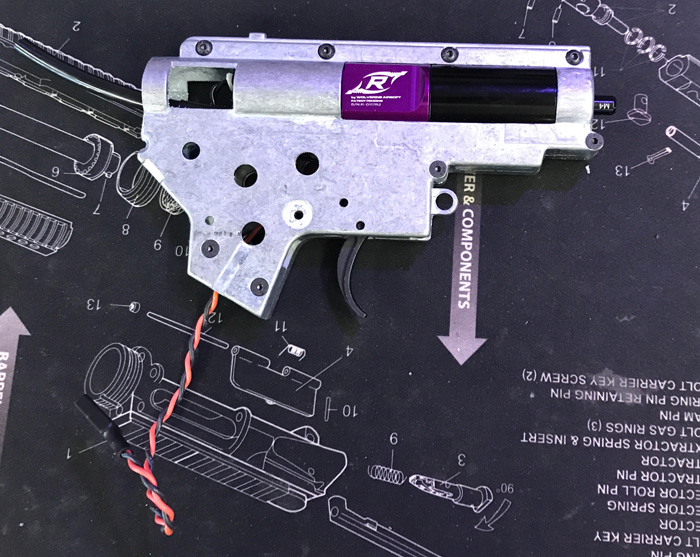
The installation of the Reaper alone is pretty easy as it literally drops inside an empty gearbox. It is compatible with a V2, V3 or an M249 gearbox. As this is a Spartan Version with full auto function, I needed to leave the fire selector plate, the safety latch and the trigger from the gearbox that I will use. You will also need to keep the small screw that holds the trigger assembly in place as you will need this to secure the FCU in place. Everything else including the electrics can be set aside.
Since I am no airsoft tech, I went to seek the help and assistance of my good friends at ROE Airsoft and also to thank the big boss of ROE Ltd, Greg “Mr G” Bull, for giving us the AEG that we used.
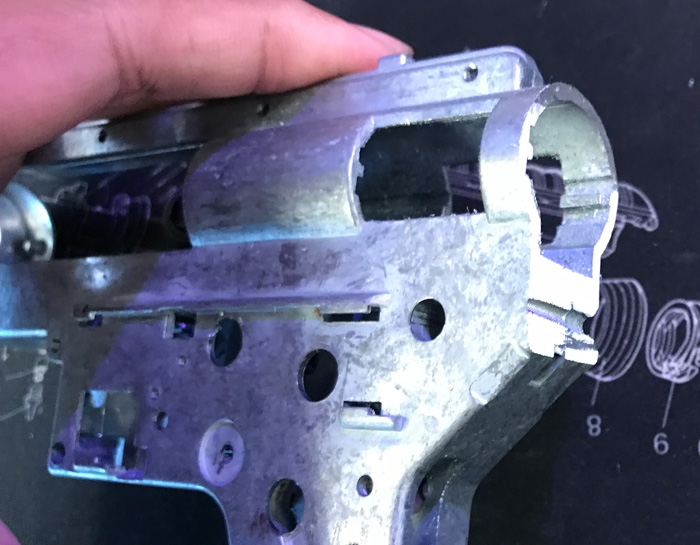
So, as I mentioned earlier, installing the Reaper is the easy part. But installing the Wraith Co2 stock is a different story. The gearbox and the lower receiver need some customisation to be able to fit the Wraith stock. All of the needed modification work is carefully explained and shown in Rich’s YouTube video “What The Tech?!?! Episode 13: Wraith Installation and Dual Air Sourcing Kit” or just search “Wraith Install” in YouTube and it should show the video on the list.
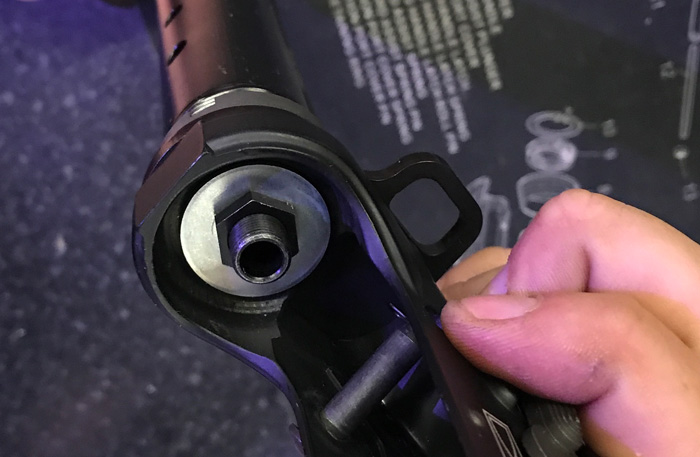
Just follow his instructions on the video and you will not get it wrong. What we had to do is cut around 7-8mm off the back of the gearbox and cut off and leave 4mm of the metal tube that sticks out the end of the lower receiver where the old stock tube attaches to. Now please note that on the lower receiver, you’re not cutting off 4mm, you need to leave 4mm of that bit. This is to provide something to hold the sling attachment in place. Again, please refer to the Wraith Install video for tips on how to do the cutting process.
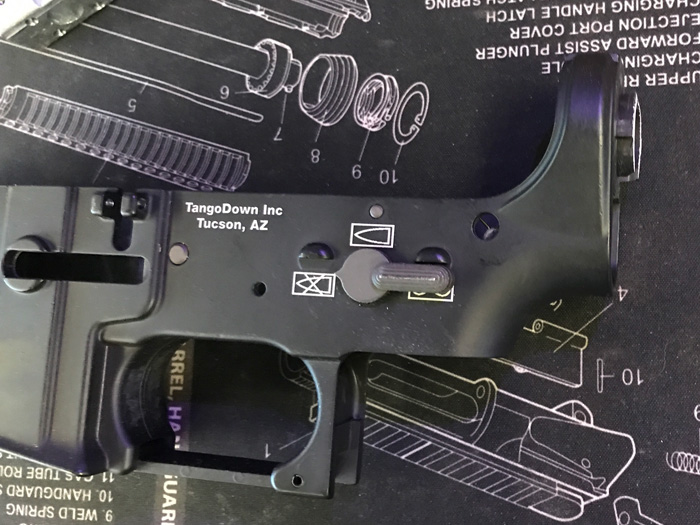
After the cutting, the video says to use a 9mm drill bit to widen the hole at the back of the lower receiver. Now this threw us off track a bit as I forgot that the AEG we are using has a quick swap spring feature and has a pretty big hole at the back of the receiver. So we had to think out of the box and decided to try and place a washer on the inside of the gearbox to place the bolt to screw the Wraith stock in place.
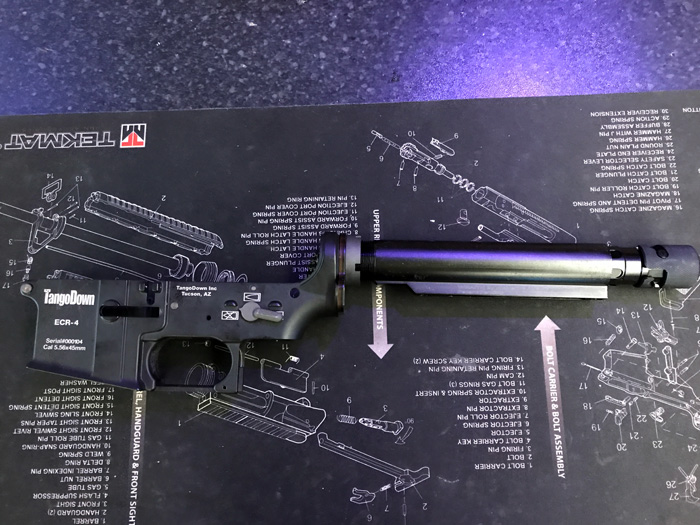
Once the Wraith stock is in place and the gearbox has been chopped, we proceeded to install the Reaper.
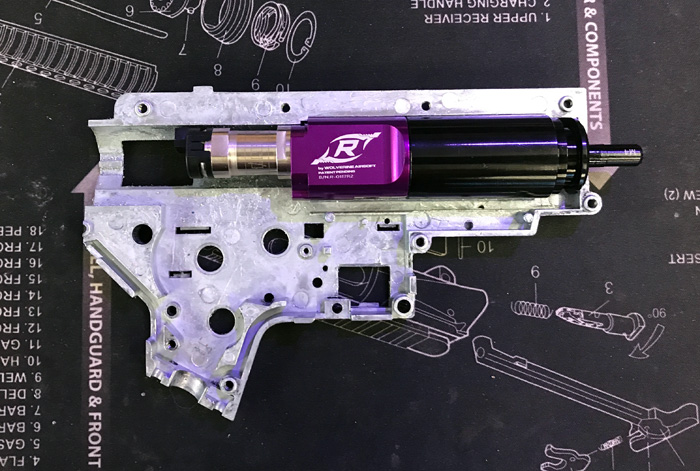
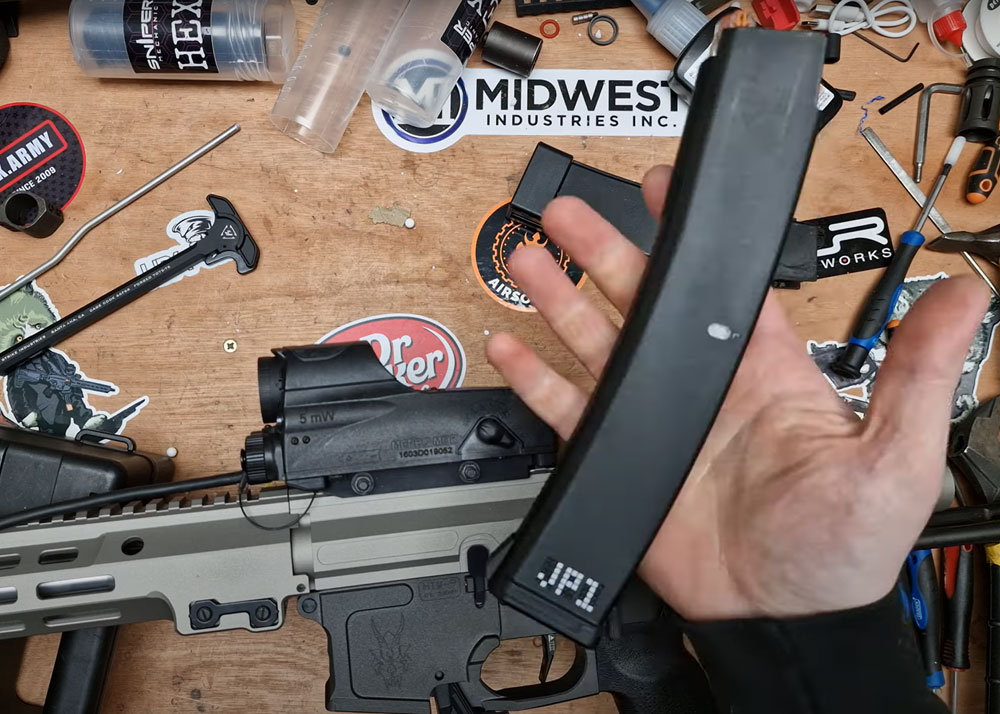
The Reaper drops in and slots perfectly into the front end of the gearbox. We also noticed that the nozzle has “M4” marked on it so it is important the order the correct nozzle for the AEG you are putting the Reaper in.
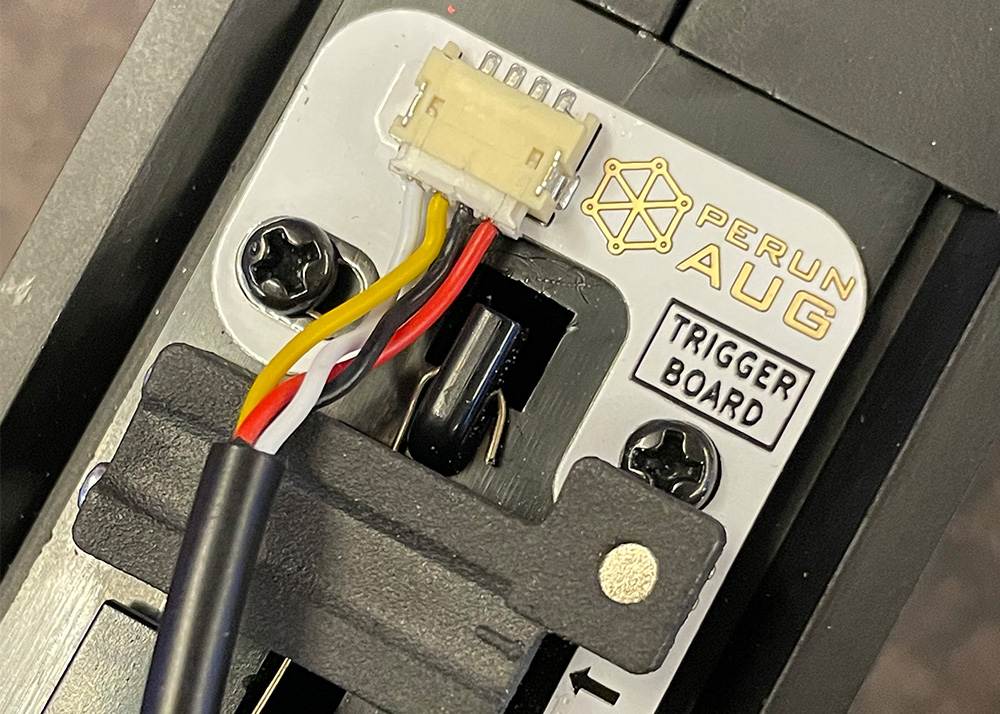
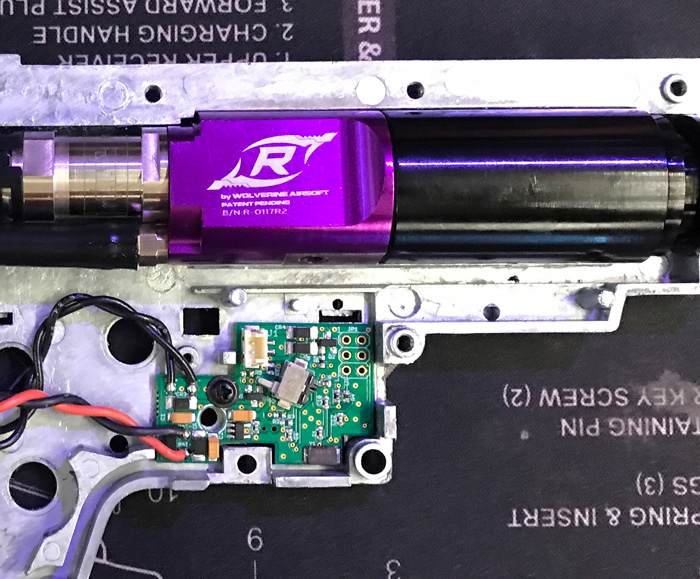
The solenoid is pre-installed so only the air-line and FCU needs to be connected at the back of the Reaper. Use the air-line provided by the Wraith as this is already cut into the correct length. Normally, the FCU battery wires go to the rear of the rifle into the stock but since the Wraith does not allow this, we had to run the wires into the pistol grip. The only drawback to this is that you will need to use a small battery to fit the pistol grip.
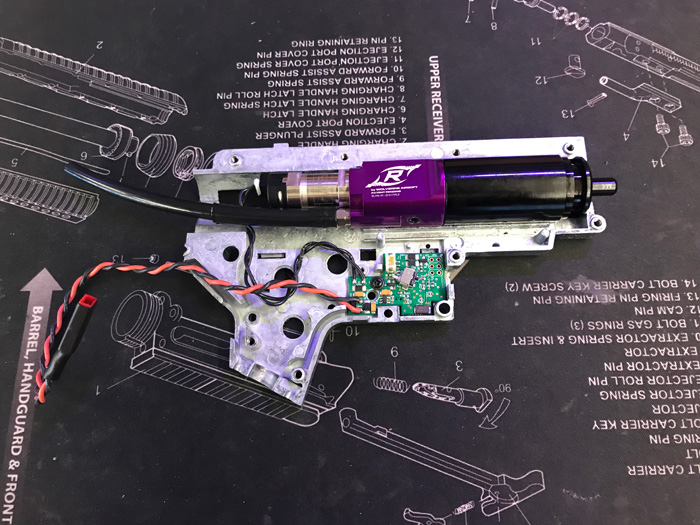
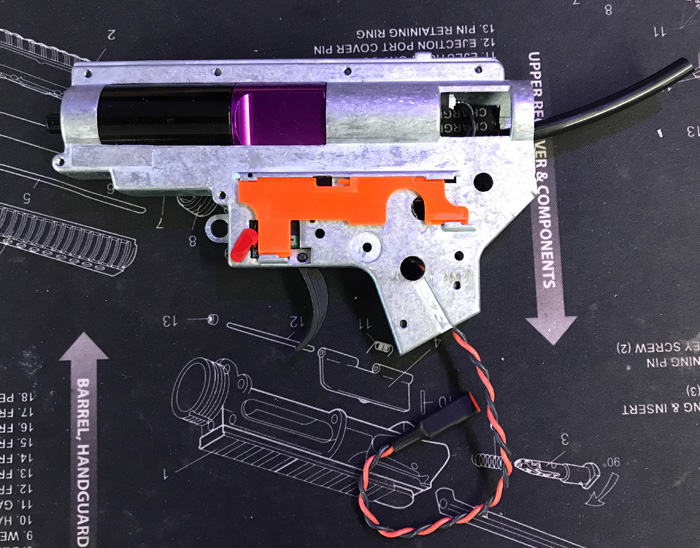
Once sure that everything is working and the gearbox is all put together, thread the air-line into the Wraith and carefully put the gearbox in place. Make sure not to the kink the air-line and pinch any of the electrical wires.
For a video on how to install the Reaper, go to YouTube and search form “What The Tech?!?! episode 23: Reaper Electromechanical Installation”.
Next step is to put the rifle all together and that is it…. You are ready to rock.
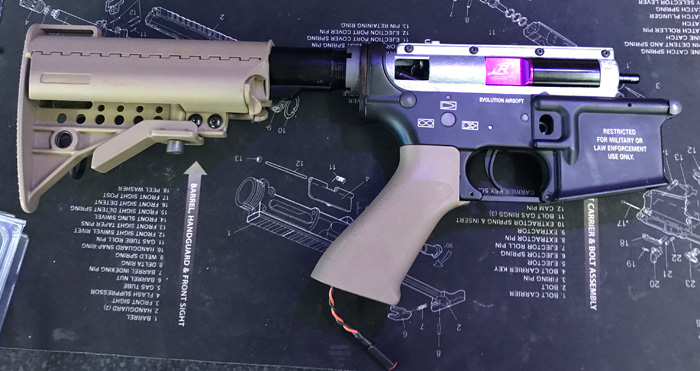
THE REAPER AND WRAITH IN ACTION
After putting the rifle back together, I had to set two things:
First, I needed to set the length of the chamber where the Co2 capsule goes. To do this, loosen the furthest screw from the rear of the rifle until the end starts turning. Loosen it enough to place the Co2 capsule and lock the end cap without puncturing the capsule. Then start tightening until you feel the capsule being punctured and the Co2 released. Then vent all the Co2 out by dry firing the rifle. Once all the Co2 is vented out, loosen the tube to the next flat surface then retighten the screw. Now try and load another Co2 capsule, you should be able to puncture the capsule easily by tightening the end cap all the way to the lock position.
The next thing that needs to be set is the muzzle velocity. Locate a hole on the top of the Wraith stock tube. Using one of the Allen keys in the pack loosen the screw to increase the muzzle velocity and tighten it to lower. Once you have done this then you are ready to go. The screw on the underneath of the Wraith nearest to the receiver disassembles the whole internal components. Make sure that this screw is tightened flushed to the surface. If this screw is loose, there is a chance that the whole internal set-up can shoot out once pressurised. Hence, never try to loosen this screw or disassemble the unit without venting all the Co2 out
As with my other HPA airsoft rifle, I found that heavier BBs work better. For the Reaper, I chose to use 0.25gm BBs. One thing that you will instantly notice is how quiet the rifle is. All you will hear is a popping sound as the air exits the barrel. On full auto, a tap of the trigger will shoot at least 3 BBs.
Co2 consumption is not too bad allowing you around 100 shots or enough to empty a midcap magazine on semi or single shot mode. This will reduce significantly if you use full auto firing mode. On rapid single shot firing I was able to empty a 350 high cap magazine using 2 Co2 capsules.
Range is very good ,easily reaching 70 metres using 0.25gm BBs.
I did have some issues with air leak through the barrel. I had to send the rifle away to tech to sort out this issue. We had to take a bit more off the gearbox to create a bit more space between it and the stock tube. My tech guy also completely reassembled the rifle to make sure that the alignment between the nozzle and the hop-up chamber is good. We also found out that the magazines affected the nozzle engagement so we started using magazines made for the recipient Rifle.
Another issue we noticed is performance variance with regards to muzzle velocity and range. These inconsistencies, we think, are due to the limited supply of Co2 within the system. As the Co2 is depleted, the pressure goes low causing the muzzle velocity to go down. Due to the set-up that we have, we have not tried the Reaper using a HPA line and air tank.
CONCLUSION
I am very happy with the performance of the Reaper and using it side by side with the Wraith stock eliminates the air line which gives you more freedom. The trigger response is awesome giving you shot after shot as fast as your finger can pull the trigger.
Having the full auto function is a bit useless as the system is better used on single fire mode. This doesn't only seem to give a more consistent and accurate range but also helps in Co2 consumption. The system will probably be better in a DMR set-up which will give the user a better performance with single fire mode and will also allow for a higher fps set-up.
Good Bits
- The system is very easy to install
- Using the Wraith stock eliminates the air line
- Very responsive trigger
- Great range and good accuracy
- Easy to set up
- Decent Co2 consumption
Not so Good Bits
- Wraith Stock installation needs quite intensive modifications on the gearbox and upper receiver
- Using the Wraith Stock can cause performance inconsistencies
Big thanks to Rich and Peter of Wolverine airsoft for helping me with this project and to Rob, Martin and Luke of ROE Airsoft for helping me with the installation and set-up and for providing me with the recipient rifle.